Truck bed rails are designed to protect your truck’s panel from scratches and dents especially when you’re loading cargo on the bed liner. Also, truck bed rails will make it easier to tie down heavy cargo or asymmetrical objects.
But for some folks, truck bed rails are all about personalizing their unique style or taste; you can even customize lights and finishes on side rails. However, sometimes you may need to remove truck bed rails, especially if you’re taking your vehicle for a paint job or you just want to replace the truck accessories.
Whatever your reasons, you’ll know how to remove truck bed rails at the end of this article; and probably everything that you need to know about truck bed rails. So let’s get started, shall we?
What Are Truck Beds And How Do They Work?
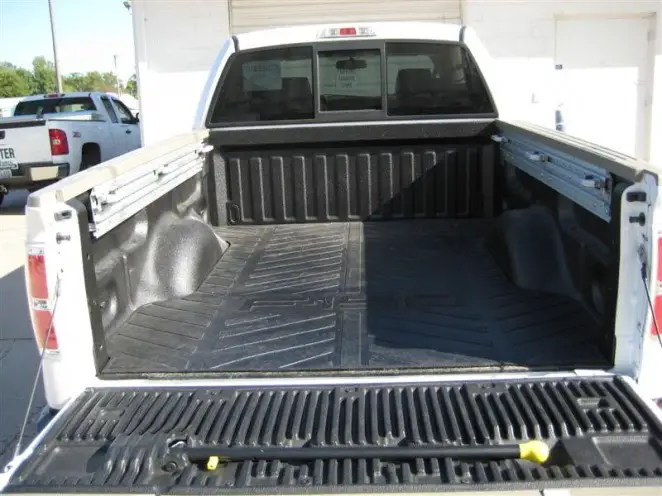
If you look at your pickup truck bed side, you may notice a plastic cap lining at the top railing surface with a few sealed holes strategically positioned at the front and back. Those holes underneath the plastic caps that you see are designed to mount truck bed rails.
Almost every truck can be customized with a bed rail; and most truck models like Toyota, GMC, RAM or Ford include truck bed rail covers straight from the factory. The manufacturers figured out that if you need to secure cargo from multiple angles and points, you will need a truck bed rail to make it easier and more convenient.
What Is The Difference Between Truck Bed Caps And Truck Bed Rails?
It’s quite common for truckers to confuse truck bed caps with truck bed rails but they’re not the same thing. For starters, truck bed caps are usually made of plastic while truck bed rails are typically made from stainless steel or aluminum.
Another difference is that truck bed rails are usually mounted and raised at the top of the panel but truck bed caps sit flat on the surface.
At a closer look, the bed rail caps are installed by the manufacturer to make the edges of your truck bed blunt so you don’t get a cut or bruise; and protect the metal surface from rust and corrosion. Even though a truck bed rail also protects the panel against dents and scratches, its primary purpose is to make it easier to tie down cargo.
Otherwise, it’s not unusual to find a truck that is fitted with both truck bed caps and truck bed rails; usually, the truck bed rail is installed on top of the truck bed cap.
How To Remove Truck Bed Rails
If you’re looking to remove truck bed rails for whatever reason, it’s important you do it right so you don’t scratch or break anything on the panel.
Of course, if you have a tonneau cover or a shell camper, you need to remove it first before you start this process.
Step 1: Locate the bracket that holds the truck bed rail in place; it should be 3 or 4 inches underneath the end piece of the rail that goes into the top panel of the truck bed. However, not all truck bed rails are installed with a holding bracket on the inside side panel (you can skip to step 3 if that’s the case).
Step 2: Remove the bolt from the holding bracket using an appropriate wrench or extension socket.
Step 3: At the top of the bed rail, you should see a fastener that pins the bed rail to the bed stake pocket. Unscrew the fastener using a socket wrench.
Step 4: After unscrewing the fastener, the truck bed rail should be loose enough for you to remove it. However, some truck bed rails are made up of 2 or 3 different pieces that are attached; if that’s the case, you should remove them separately.
Step 5: Repeat the process until you’ve removed the remaining truck bed rail.
Please note: In most cases, removing a truck bed rail is the reversal of the installation process. It should be a simple process, and if you’re stuck somewhere, you can check the manual that came with the truck bed rail when you bought it.
How To Remove Truck Bed Caps
Removing truck bed caps can be tricky because it’s very easy to break the plastic caps. However, it can be done if you stick to the following process:
But before you start, make sure you’ve removed the truck bed rail.
Step 1: Take a screwdriver and put the tip underneath the plastic cap stake holes next to the bed pocket that is used to fit the truck bed rail; it should be close to the tailgate.
Step 2: Take another screwdriver and squeeze it under the edge of the plastic cap at a 90-degree angle in the opposite direction.
Step 3: Push both screwdrivers upwards at the same time until you lift off the plastic bed rail cap at the edges. However, do it gently so you don’t break it.
Step 4: If you find it hard to unclip the bed tabs using screwdrivers, you can use a heat gun on low heat settings to soften the plastic caps. When the plastic cap is warm, it will be easier to lift it using the tip of a screwdriver.
Just be careful not to use excess heat.
Step 5: We’re not done yet! After you’re done unclipping the truck bed cap on the edges, you still need to remove the rest of the plastic cap along the top panel rail.
To do this, you should start by compressing the clips underneath the top panel rail using snub nose pliers.
Step 6: After you’ve released the pins with snub nose pliers, take a screwdriver again and put the tip under the plastic cap so you can unhook it off the rail.
Step 7: Remove the remaining truck bed cap off the rail from one end to another using your hands. However, be careful you don’t break it.
Here is a video of how it should be done step by step:
Conclusion
There is no other way around it; if you want to upgrade your truck’s looks, sometimes you have to remove the truck bed rail or the truck bed cap. It should be relatively easy if you follow the process we’ve recommended.
However, if you find it difficult to remove the truck bed cap off the rail, you should take it to a professional mechanic to help you out.